


Why am I seeing this picture? Media Credit – Freepik
Important Note for Sellers: To set up a business profile which is mandatory for sellers, create an account with an email address from your business domain (Example - [email protected]).

Subscription Plans & Feature Availability  ✓ Give  ✓ Nurture  ✓ Thrive  ✓ Flourish
You post a refurbished patient monitor. The messages arrive within the hour:
What year is it? Is the serial number available? What’s the warranty? What comes in the box? Where is it?
Every one of those answers exists. You just didn’t put it in the listing, so you type it out again, buyer after buyer.
Why listings leave gaps
When a buyer can’t see or touch the device, the listing is all they have. The refurbished market is large: Fortune Business Insights estimates it at USD 14.28 billion in 2025, though estimates vary by research firm. The same analysis points to hesitation among procurement teams when service history is incomplete.
So a thin listing costs you twice. You lose the buyers who don’t ask, and you spend time on the ones who do. The other half of the problem is effort.
A well-researched listing means looking up specs, writing out accessories, and drafting descriptions, for every device. That’s why many listings go up half-finished. In a focus group work study, creating an accurate, well-researched listing took between 27 and 45 minutes across competing platforms.
A better way: a listing built to be complete
Gerätor’s add-device form is structured so the details buyers ask about show up as fields, not afterthoughts. Category and OEM come from a controlled list, built on Gerätor’s proprietary taxonomy, which gives buyers more accurate search results and better filtering. Geolocation features let buyers search by proximity to their preferred locations, so the address on your listing helps the right people find it.
Then there’s Wiz AI, Gerätor’s AI agent, which does the research and drafting for you.
You add listings from your dashboard. This is available only to users with an approved business profile. If you haven’t set yours up yet, start with building your business presence.
The form has three steps.
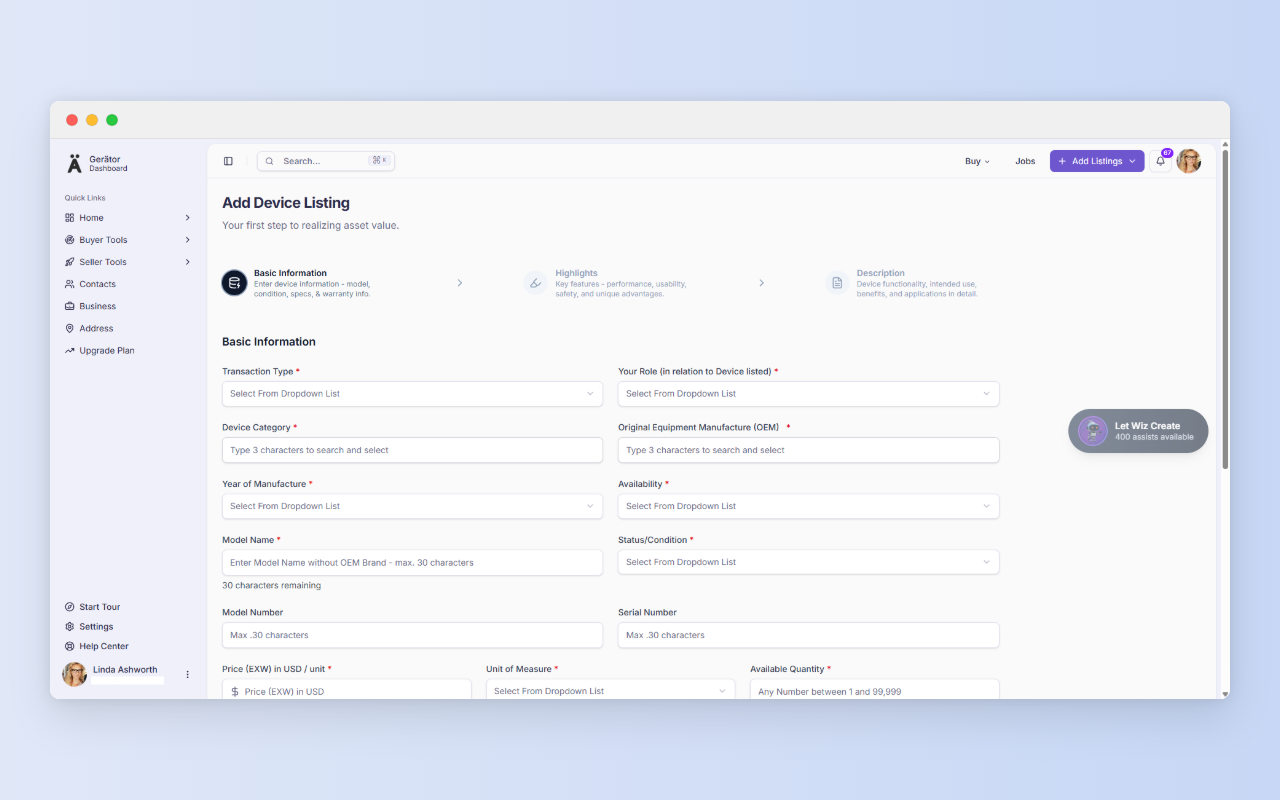
Step 1: Basic information
Step 1 is where you tell buyers what your device is. Pick the category, OEM, and model so the right people can find it. Be upfront about condition and year of manufacture, and add a model and serial number to build trust.
Prices are EXW (ex-works), so they exclude shipping and duties. Then set your unit, quantity, warranty, and shipping terms. The more accurate you are here, the fewer questions you’ll get later.
A useful way to think about it: each field does one of three jobs. It builds buyer trust, feeds search and matching, or supports compliance and risk. Most do more than one.
Let Wiz AI help
Fill in the mandatory fields of Step 1, and Wiz AI takes over. It researches and consolidates content for the fields in Steps 2 and 3, so you get a draft listing instead of a blank form.
Wiz is built on agentic AI. That means it works toward a goal across several steps instead of answering one prompt at a time. Here, the goal is a complete, well-researched listing. The repetitive part, looking things up and writing them out, is handled for you. Your time goes to what only you know: the real condition, history, and details of your device.
Some things stay in your hands, because they have to come from you:
- media (images and video)
- the device address
- supporting documents

In the focus group study, the same listing took 27 to 45 minutes on competing platforms and under 5 minutes with Wiz AI on Gerätor.
Important: Wiz usage limits depend on your subscription plan. And whatever Wiz drafts, treat it as a draft. You know the device, so check every spec and regulatory number before you publish.
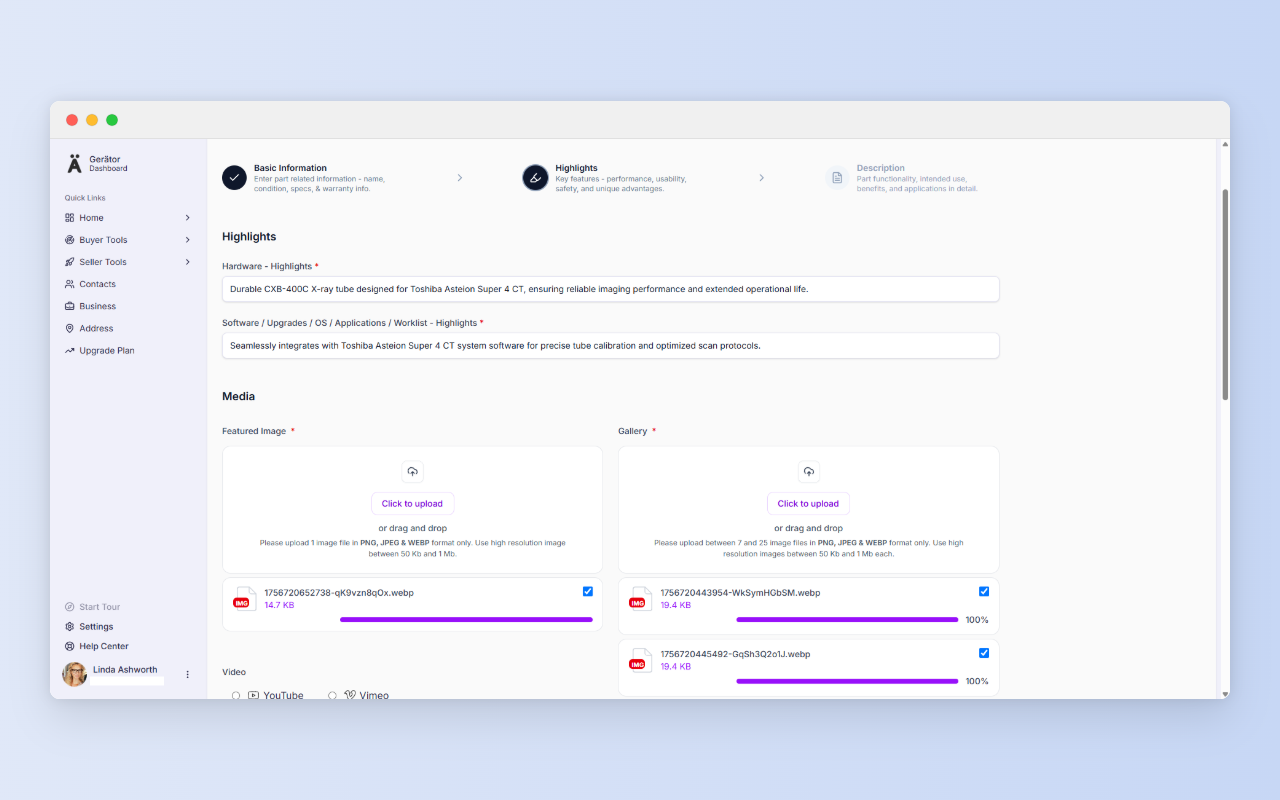
Step 2: Highlights
Step 2 is your chance to show buyers what they can’t see in person. Highlight key hardware specs, software versions, and accessories using real numbers. Say what’s included versus what’s only compatible. Wiz can draft these highlight fields for you to review.
Upload one featured image and 7 to 25 gallery photos (PNG, JPEG, or WEBP, 50 KB to 1 MB each). Cover the front, back, label plate, and the device powered on. A short YouTube or Vimeo video helps too.
Then confirm where the device is. Choose from the addresses you’ve saved on the Address page.
If your business profile is approved, you can add a device listing now. If you’re still setting up, start with building your business presence.
Ready to try it?
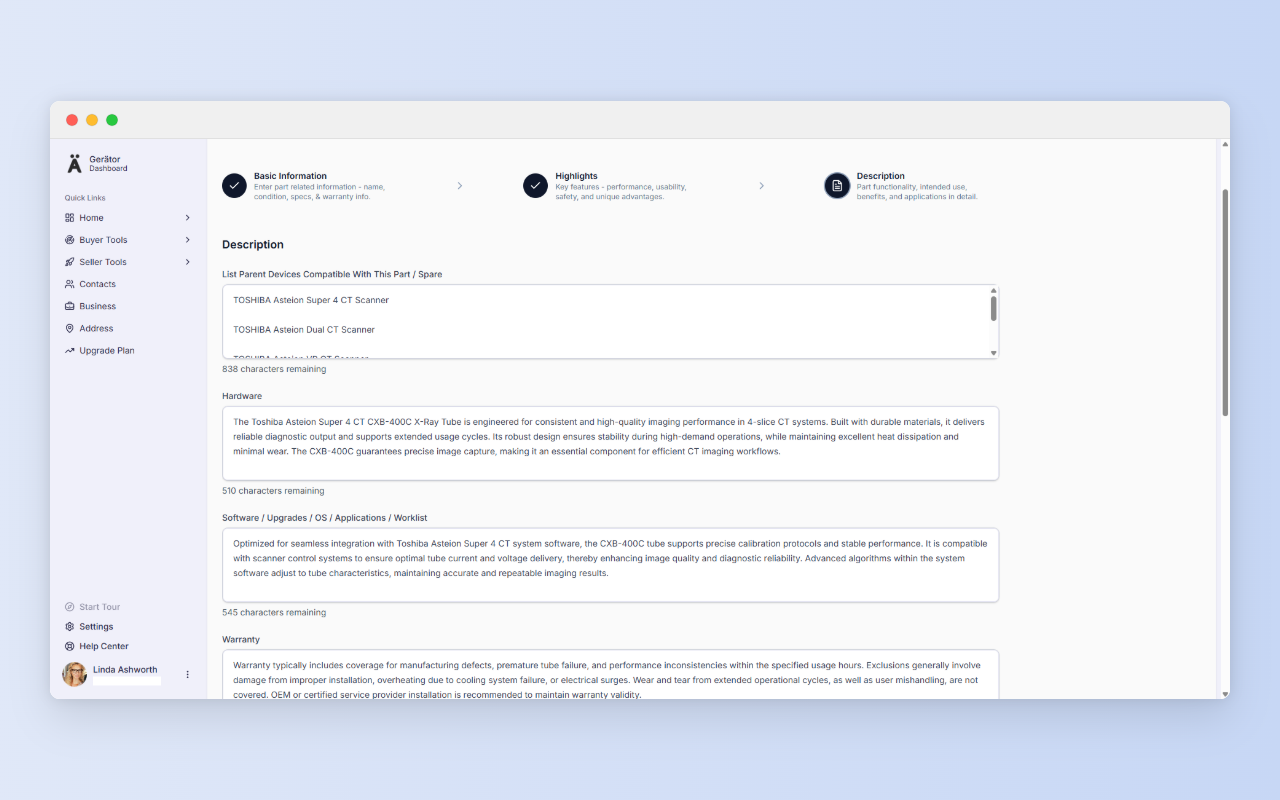
Step 3: Description
Step 3 is where buyers go to verify. Cover hardware, software, accessories, warranty, service history, and packing, and keep it consistent with Steps 1 and 2. Be specific: dates, durations, and what’s covered.
Then upload your supporting PDFs (max 1 MB each), such as service records, certificates, or manuals. Documents are the only required field here, and they turn your claims into proof. Double-check any regulatory numbers.
What this looks like in practice
- The refurbisher with several units: You’ve tested a batch of identical monitors. Set the quantity and unit once, review the content Wiz drafts, then add your photos and documents.
- The trader with one high-value unit: A single imaging system needs more proof than a stack of accessories. Service records and certificates in Step 3 answer the questions a cautious buyer would otherwise ask by email.
- The technician selling spares: In Step 2, state clearly what’s included and what’s only compatible, so buyers know exactly what they’re getting.
- The seller with an older device: Age is a hurdle for buyers. A clear year of manufacture, honest condition, and a documented service history show you have nothing to hide.
Two tips worth taking
Keep the three steps consistent. If the warranty in Step 1 says one thing and the description in Step 3 says another, buyers notice, and they start doubting the rest.
Let documents do the persuading. A claim like “serviced regularly” is easy to dismiss. A dated service record is hard to argue with.
No business email yet?
A business profile requires a business email, and Gerätor recognizes public providers such as Gmail, Yahoo, Hotmail, Outlook, and Protonmail. If you signed up with one, you won’t be able to create a business profile. You’ll be prompted to get a business domain and email instead, with GoDaddy offered as an option through our partnership. Then log out and create a new account with your new business email.
If you later want a website too, Cloudways offers managed cloud hosting built for speed, security, and performance, whether you’re launching a new site or scaling an existing one.
In regions where you are unable to progress to location without a business email, once your business email is ready, add your first address at https://gerator.com/dashboard/settings/address. It takes a few minutes, and it answers the first question every buyer asks.
A few more things before you go…
We value clarity and fairness. Here are a few helpful links to read as a new user:
Terms of Use – Understand your rights and responsibilities.
Privacy Policy – Learn how we handle your data with care.
Security – Know the steps we take to protect your account.
Business Verification – See how we build trust in our ecosystem.
Pricing – Compare plans and their benefits.
Refund Policy – Know your options if things don’t go as planned.